Editing a Community
1. Log in to your dashboard through this link: https://campaigns.causematch.com/login with the credentials shared with you.
2. Select the Peer to Peer Option on the left side panel to access the layers(ambassadors, communities etc)
3. And then as seen in the image below, from the Campaign selection drop down->select the Active campaign
3. Once the campaign is selected, select corresponding Layer tab- Communities to see the list of all communities available for that campaign.
4. And then you can locate the particular Community by searching it in the search box using the Community name.
5. And then click on the edit button (Pen Icon), under the Action label in right side.
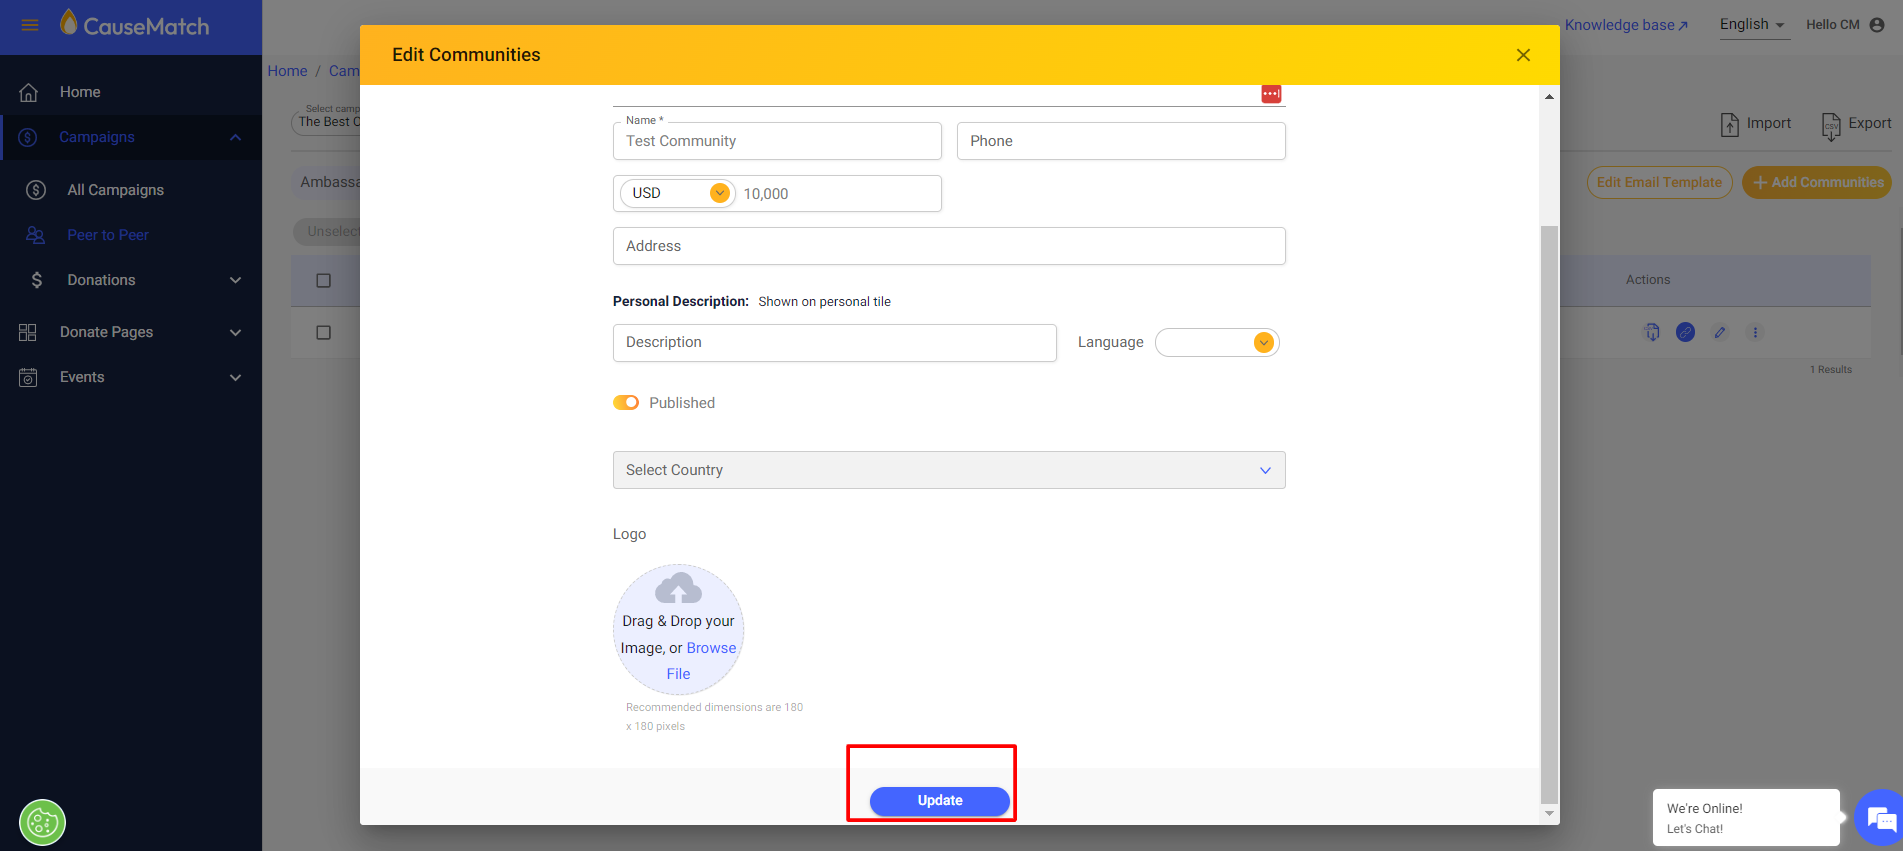
6. A new pop-up will appear, edit all the required info to this pop-up.

*Please note "community name", "currency" and "goal" are mandatory fields and cannot be left empty. However, the goal can be added as 0.
7. When done, proceed to save the changes by clicking on Update button seen in the bottom of the Pop of window


*Also, make sure the publish button is enabled, the edits will reflect on the page only if this is enabled.
Tutorial video: Coming Soon
Related Articles
Move an Ambassador/Teams to a Community
Important Note: In our system, the terms 'Teams' and 'Ambassadors' are used interchangeably. Please do not be confused by this, as they refer to the same functionality. This guide outlines the steps for assigning or updating an ambassador (or team) ...Editing Campaign Dates
To begin editing Campaign Dates: Step 1: Log in to the Dashboard: Once logged in, you’ll see a list of your campaigns. Step 2: Select Your Campaign: Locate the campaign you wish to edit and click the pencil icon (edit button) next to it. This will ...Editing your campaign goal
To begin editing your campaign goal: Step 1: Log in to the Dashboard Once logged in, you’ll see a list of your campaigns. Step 2: Select Your Campaign Locate the campaign you wish to edit and click the pencil icon (edit button). This will take you to ...Editing Team/Ambassador Pages
Accessing the Ambassador/Team Edit section Login to your account using the username and password shared with you. Select the Peer to Peer option on the left side panel to access the layers (ambassadors, communities, etc.) And then as seen in the ...Editing the Checkout page
The Checkout section enables you to customize every aspect of your campaign's checkout process. You can add currencies, configure payment gateways, edit receipts, and set up donation notifications, as well as donor rescue notifications. Accessing the ...