How to edit a donate page
- Once you log in to the dashboard, Go to the “Donate Pages” dropdown and click on "Donate Pages".
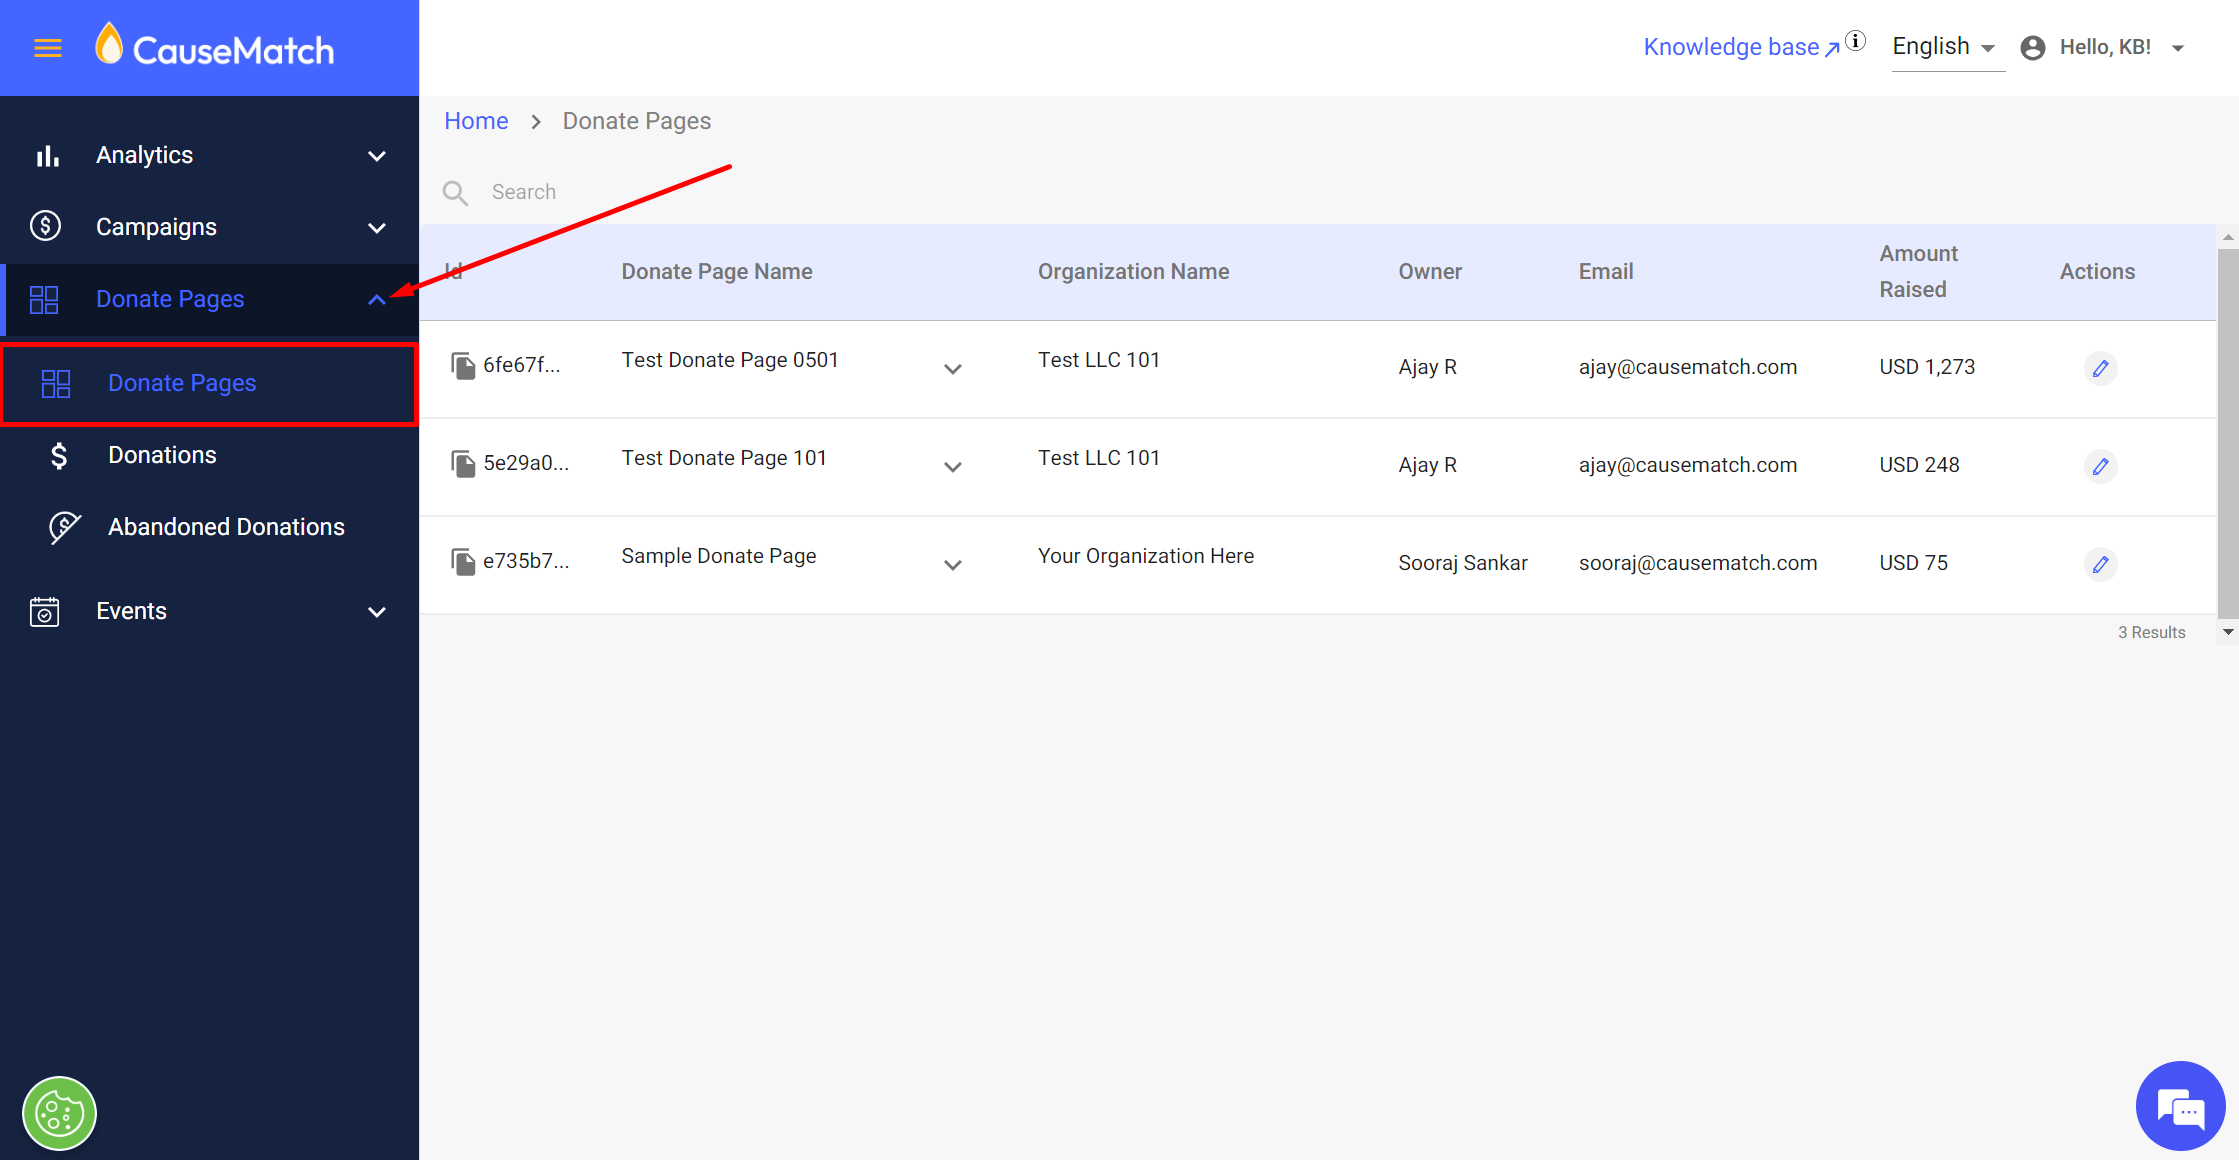
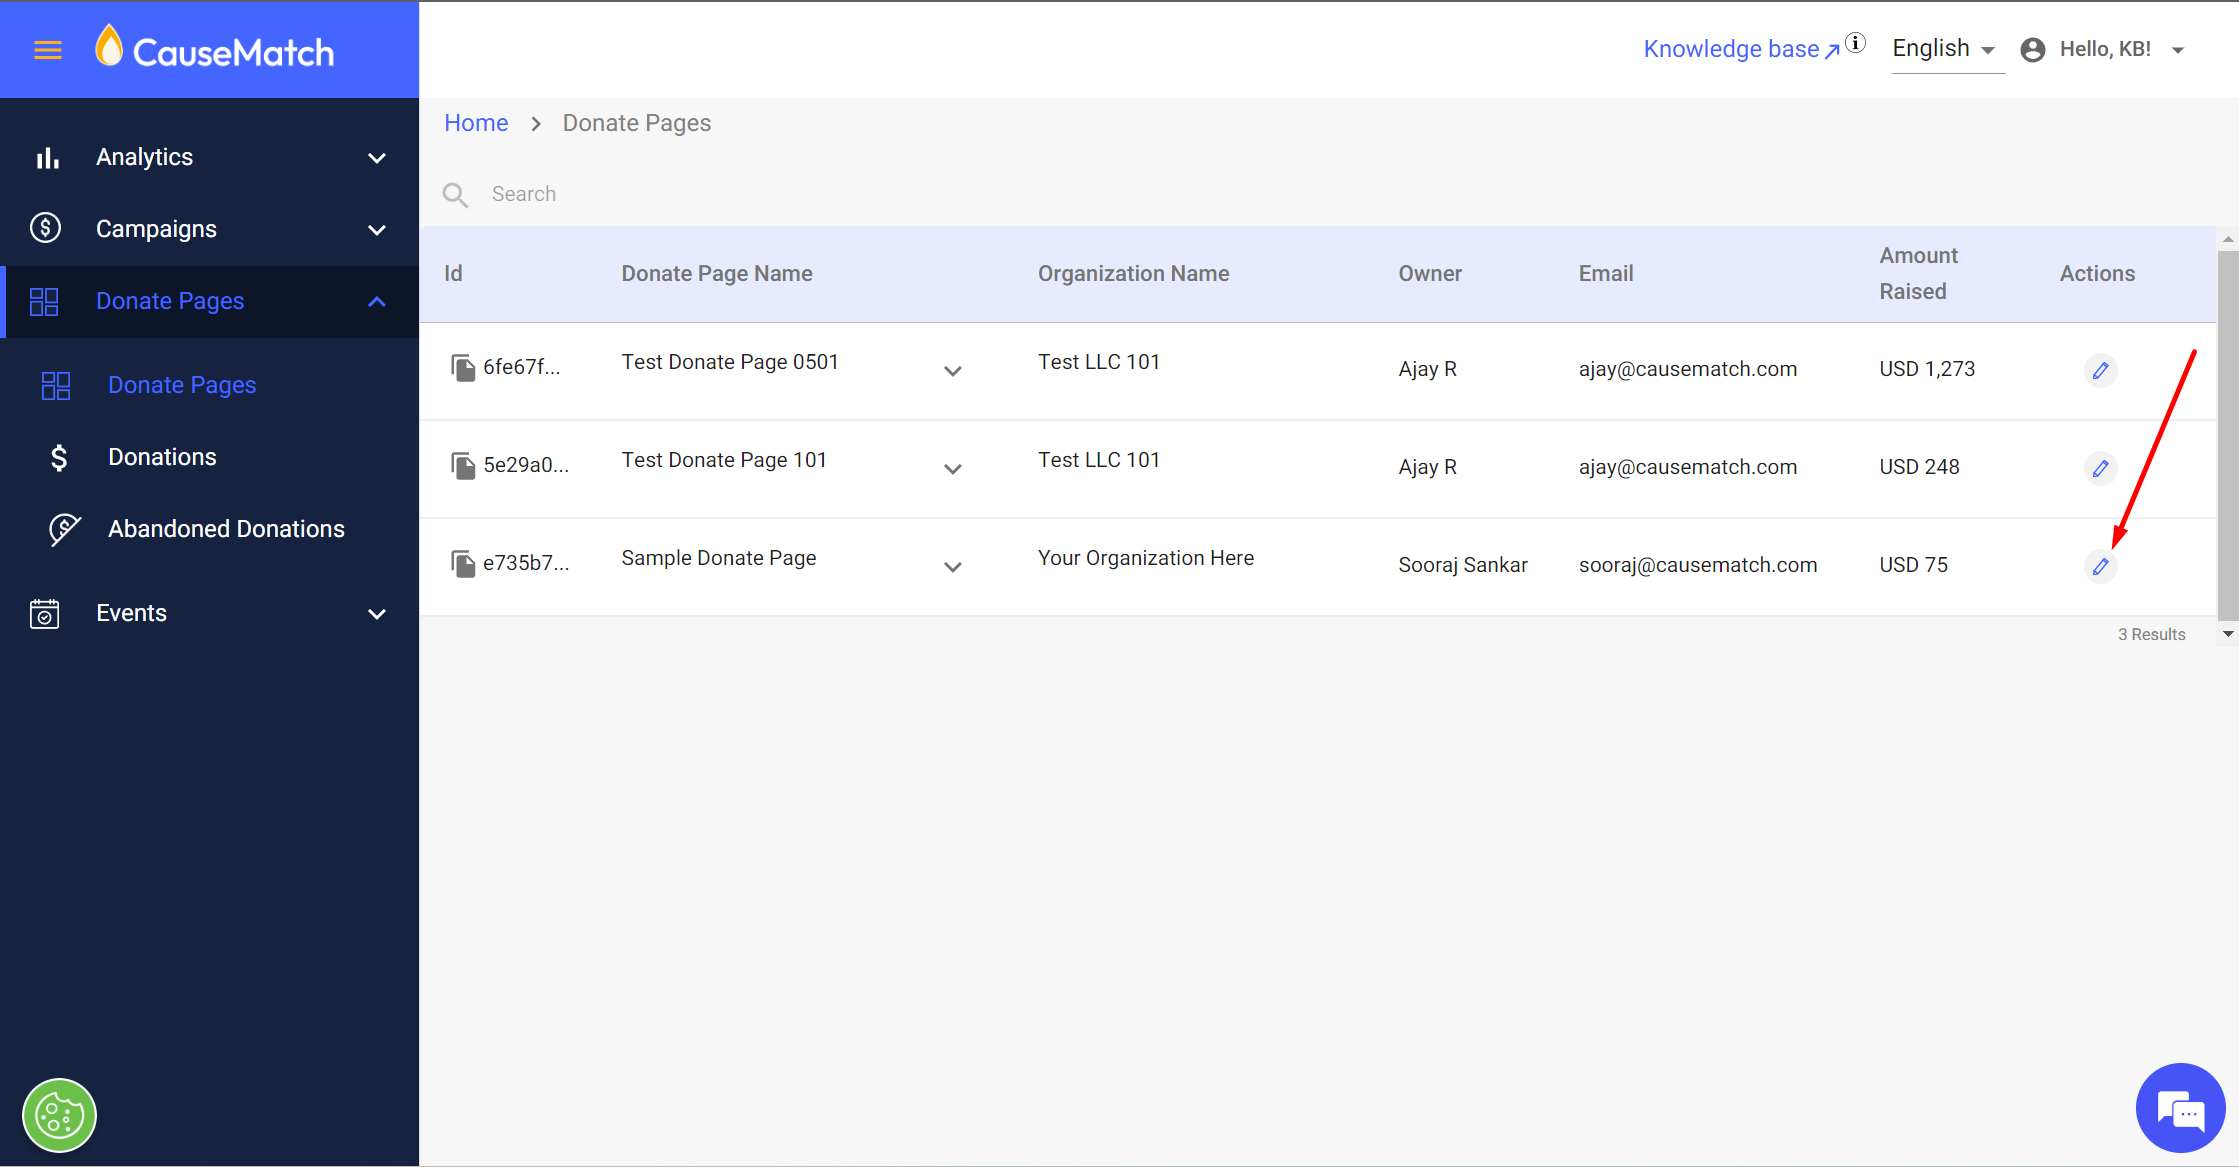
- Click on the edit button of the donate page you want to edit as shown below.
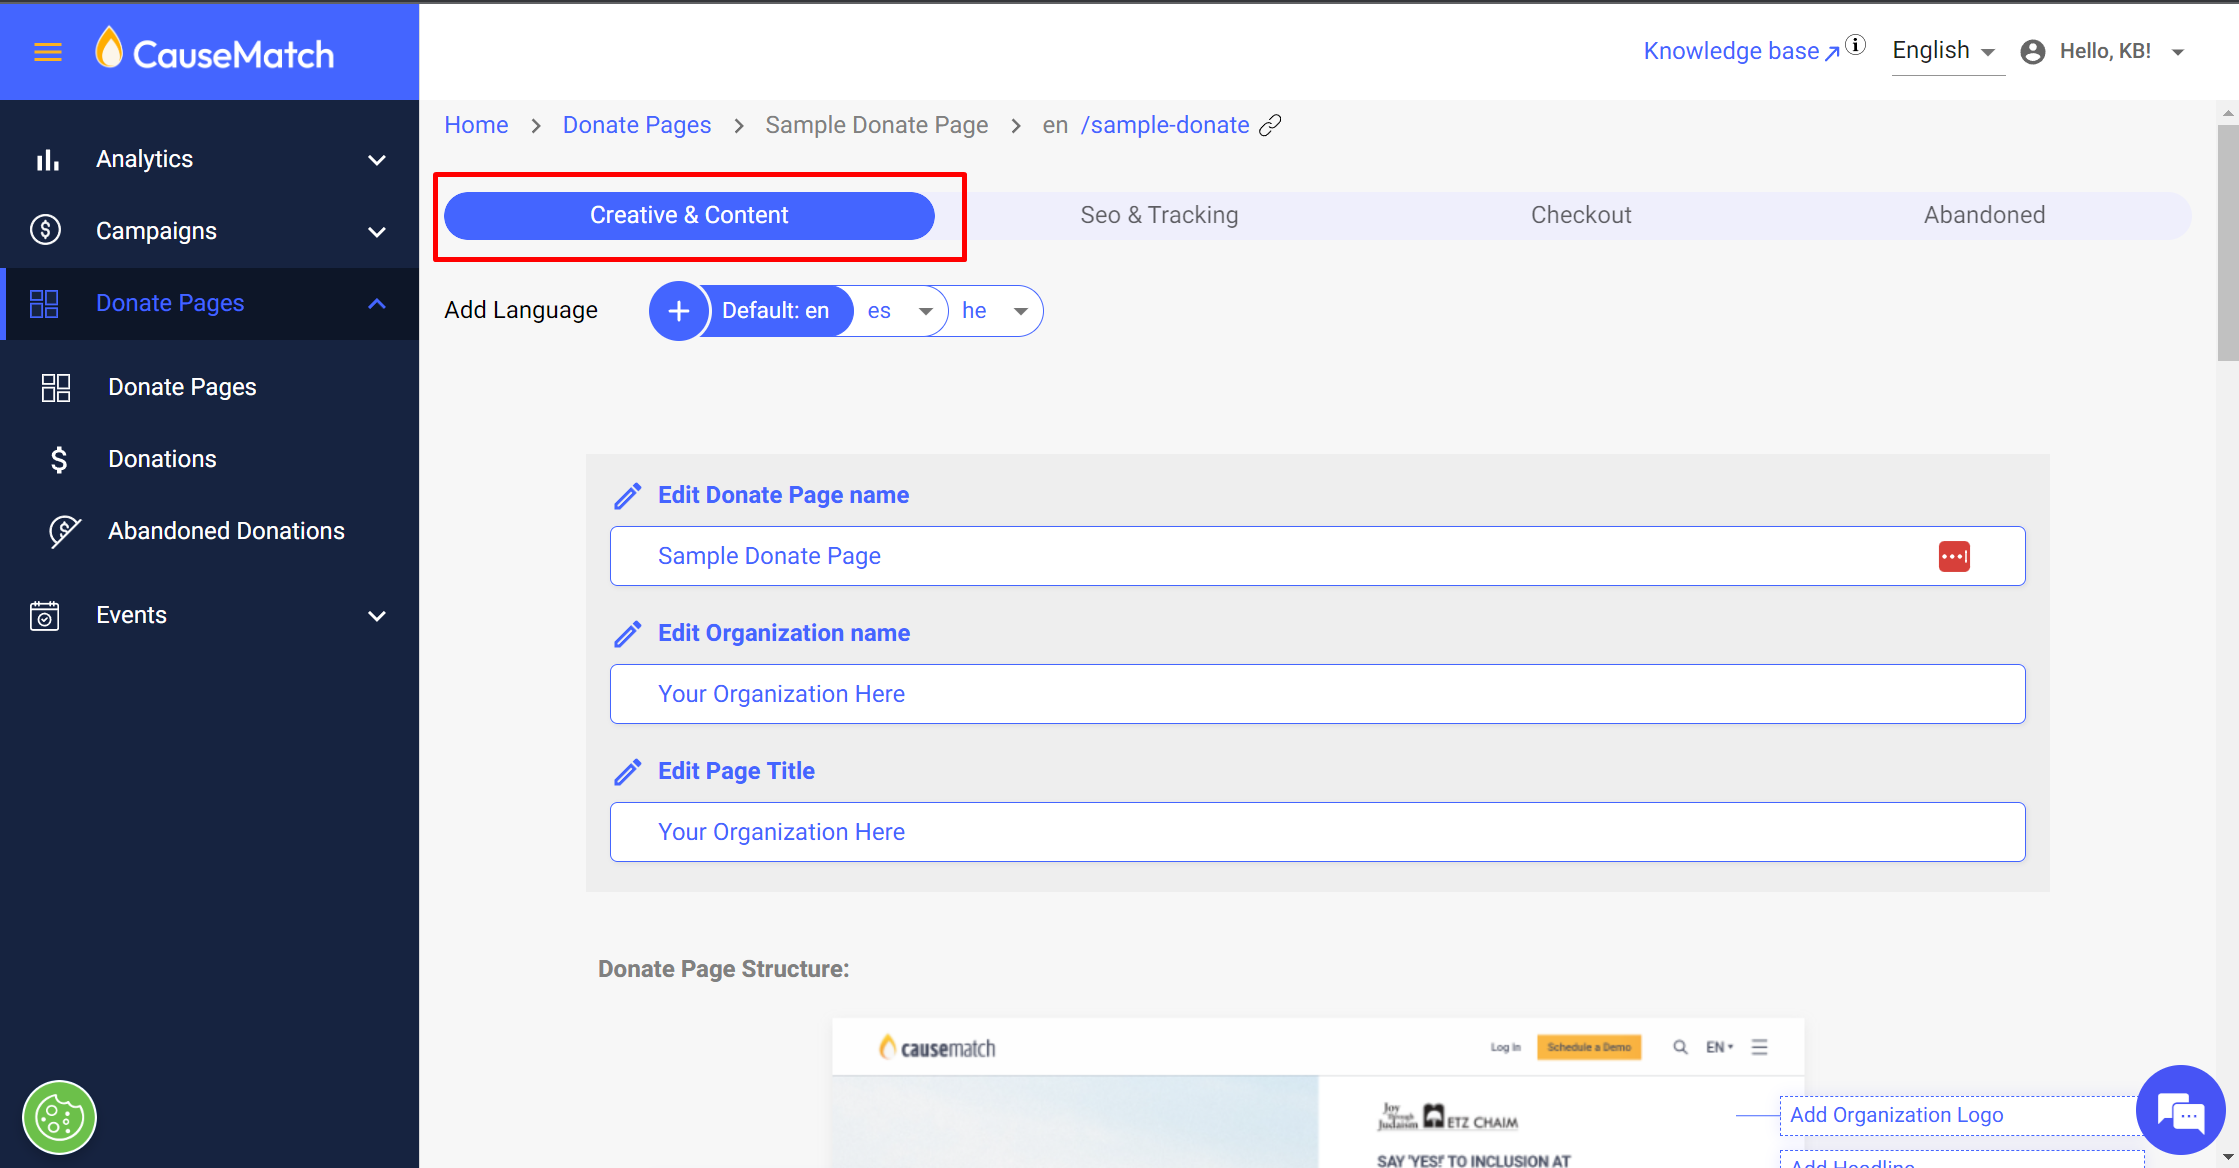
- You will now be redirected to the "Creative and Content" tab.
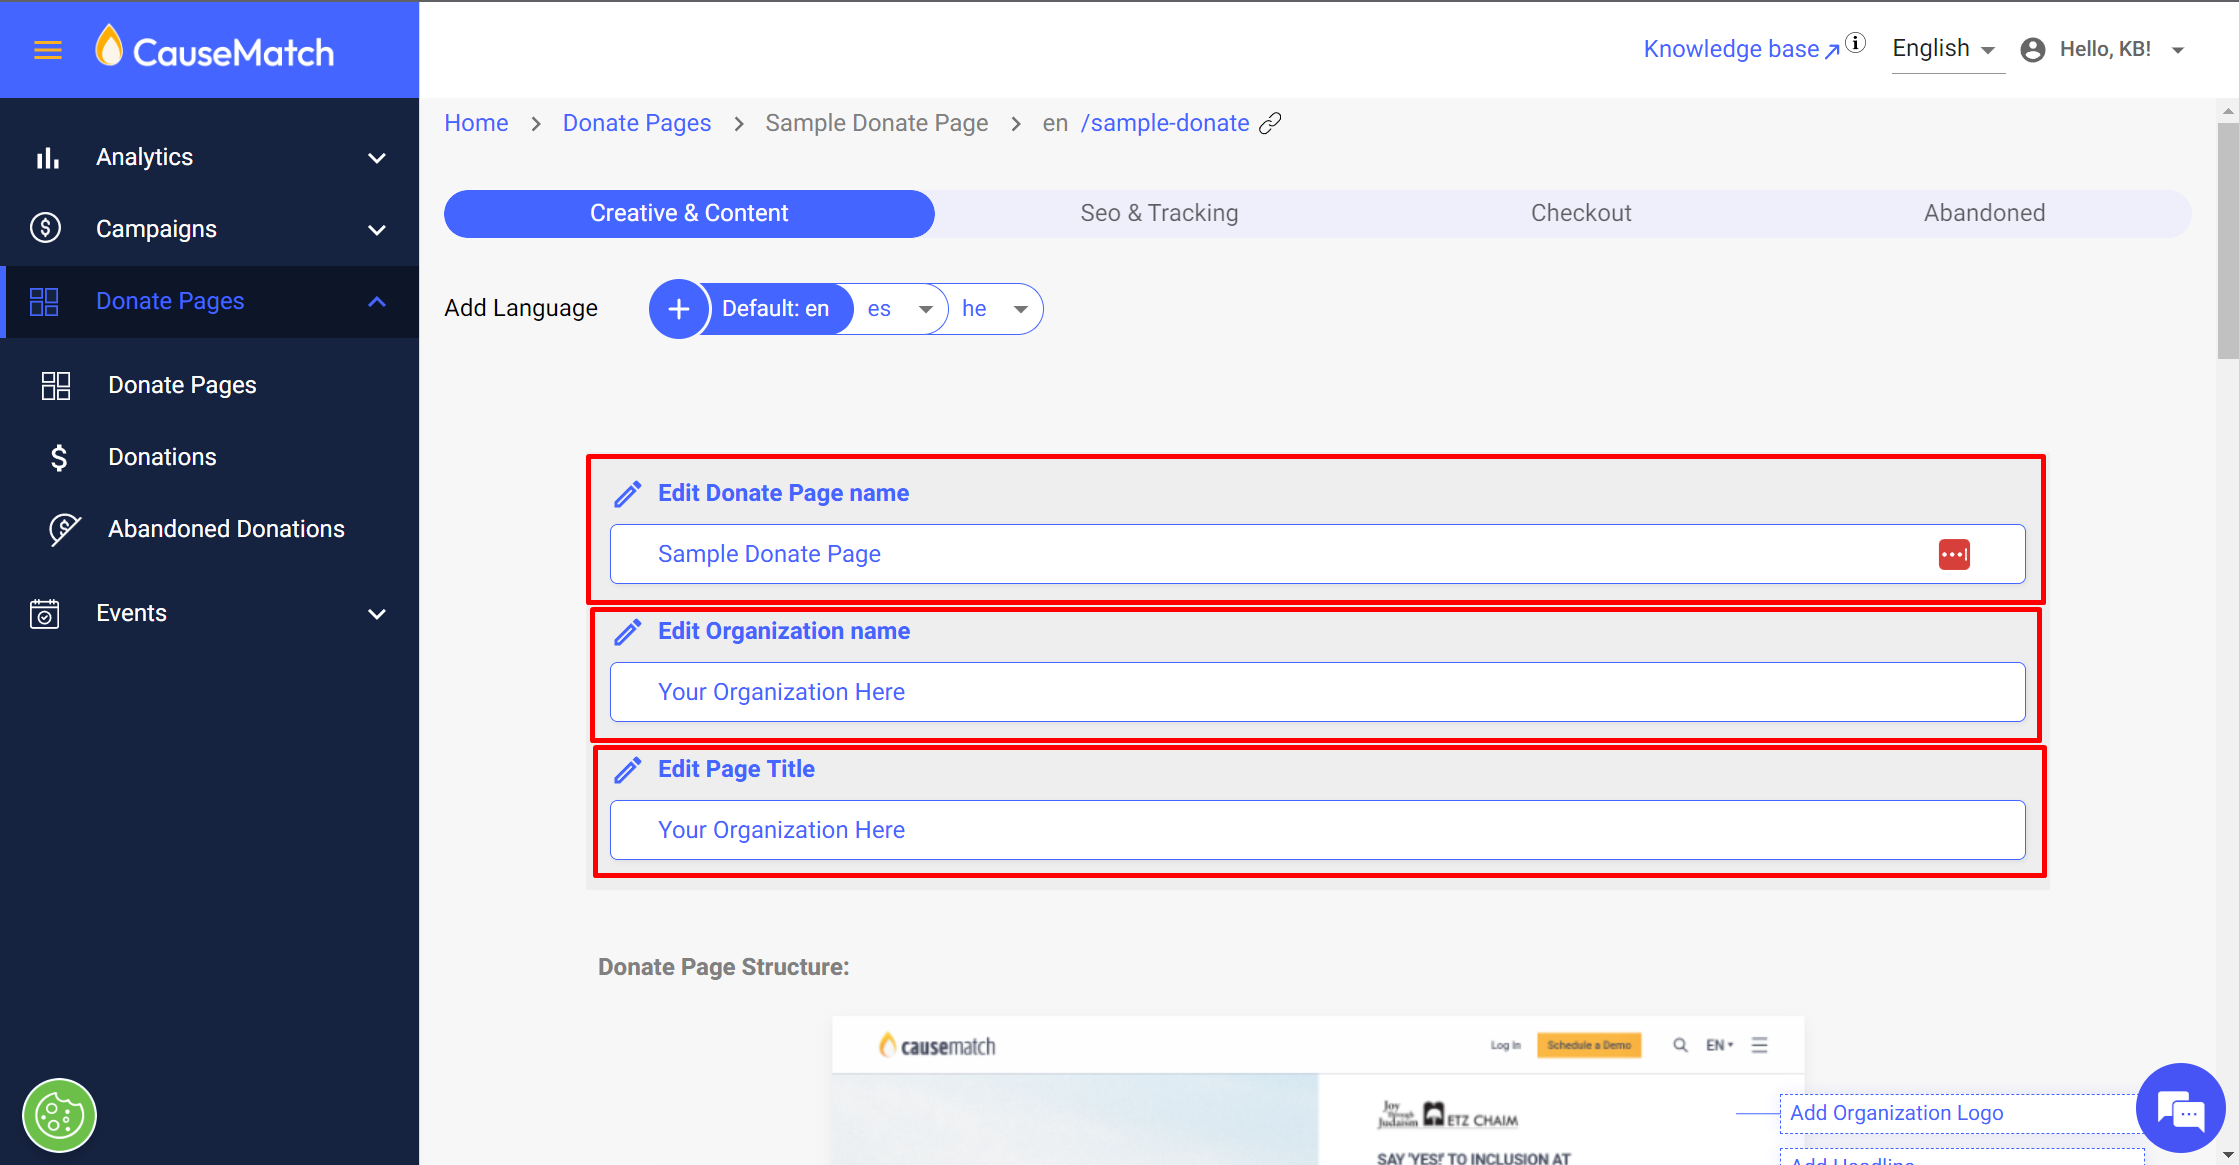
- You can edit the "Donate Page Name", "Organization Name" and "Page Title" from the options below.
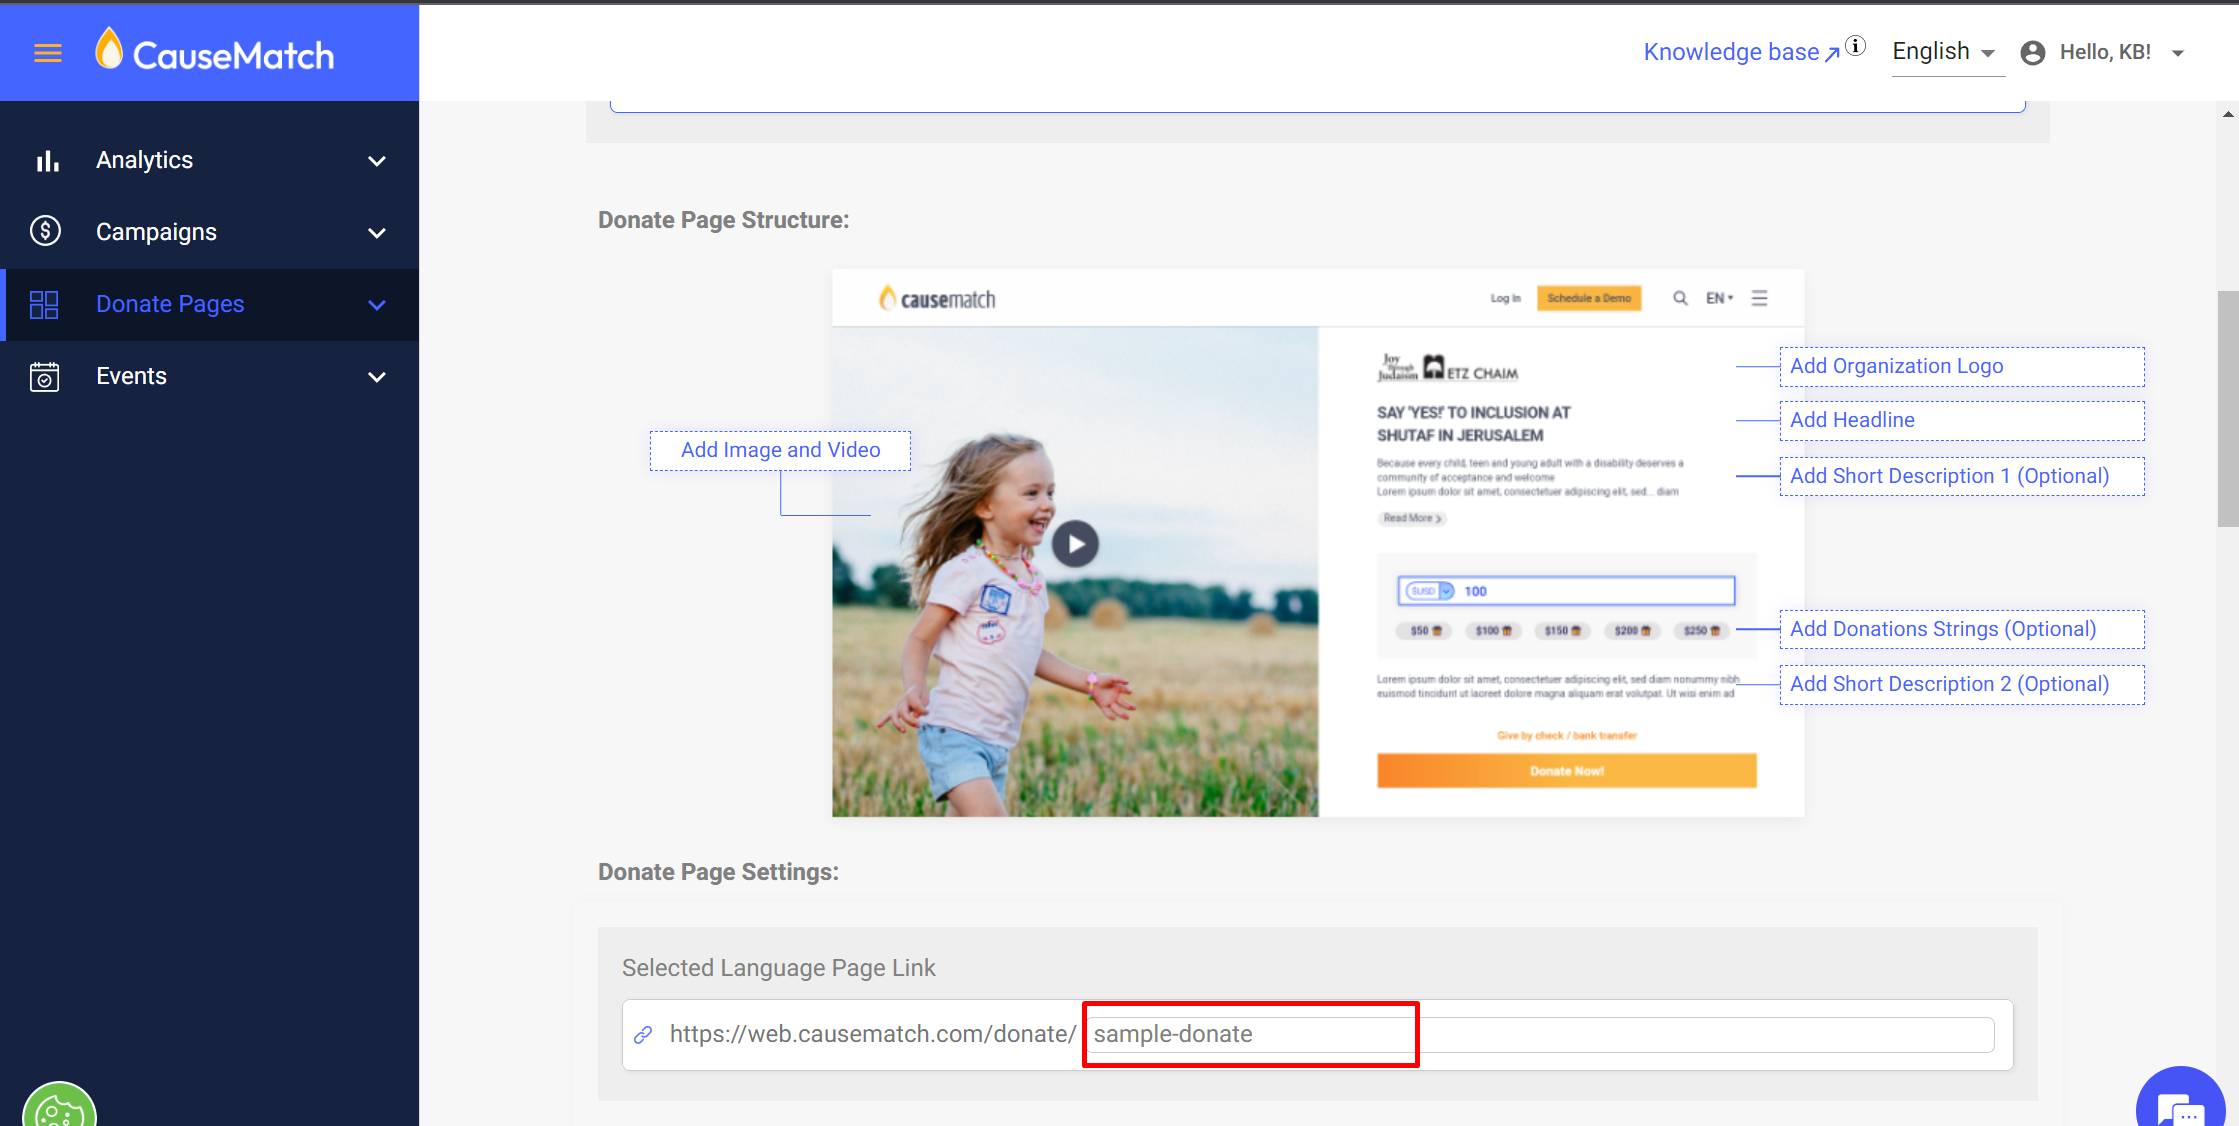
- You can edit the Donate Page URL here.
- Next, we can edit the graphics and video on the page.
i) To Add or Edit the video we can click on the "Add video" checkbox as shown below and enter the Youtube or Vimeo video link.

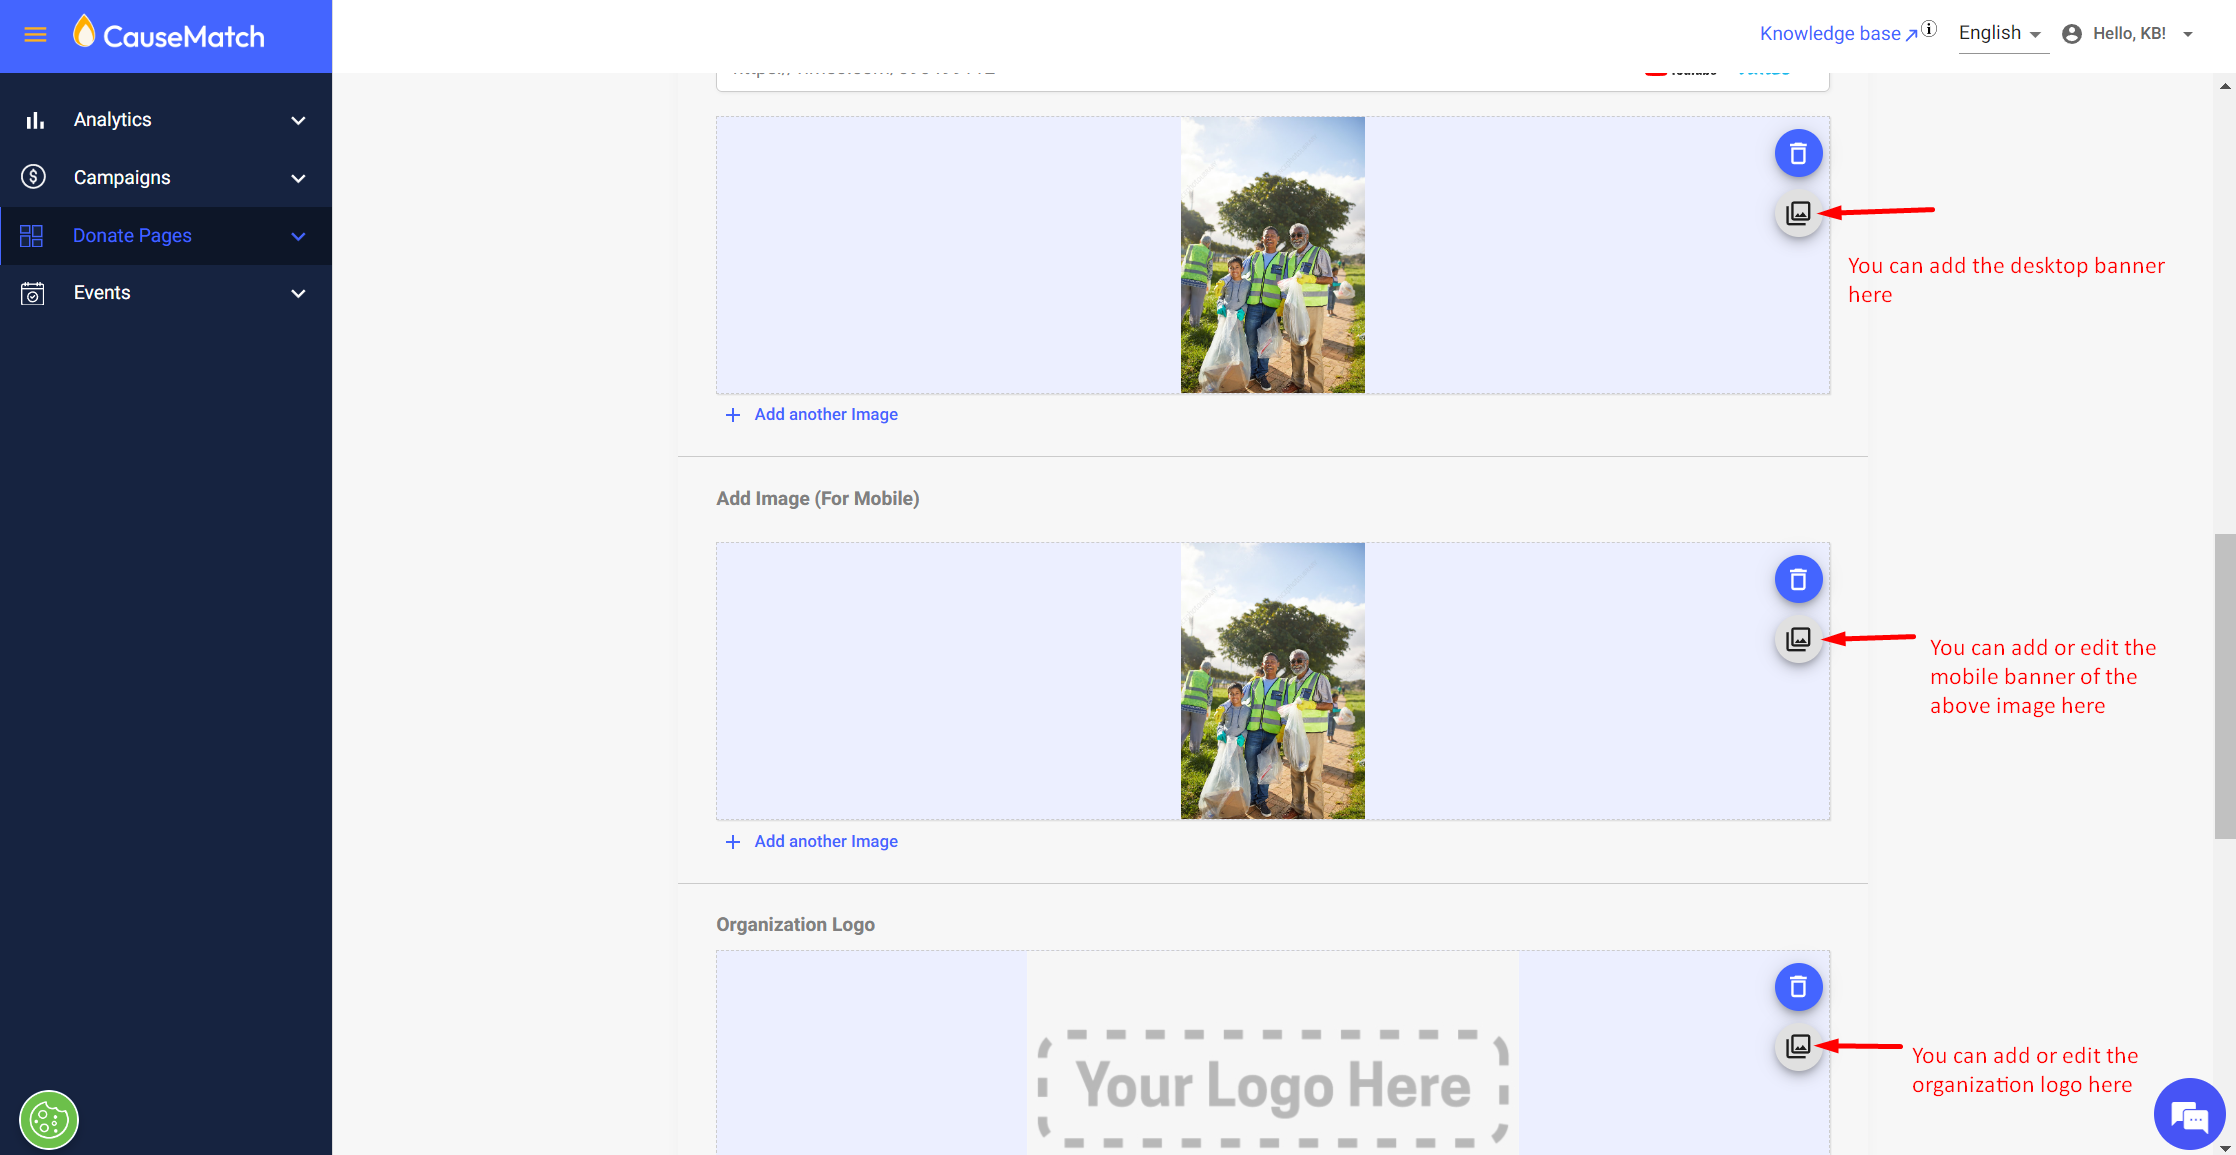
ii) You can add the desktop banner, mobile banner, and organization logo as shown below. The desktop banner should be in 657x794 px size. The mobile banner should be in 364x181 px size and the organization logo should be in 200x50 px size. You can add multiple banners both on desktop and mobile by clicking on the "Add another Image" option.
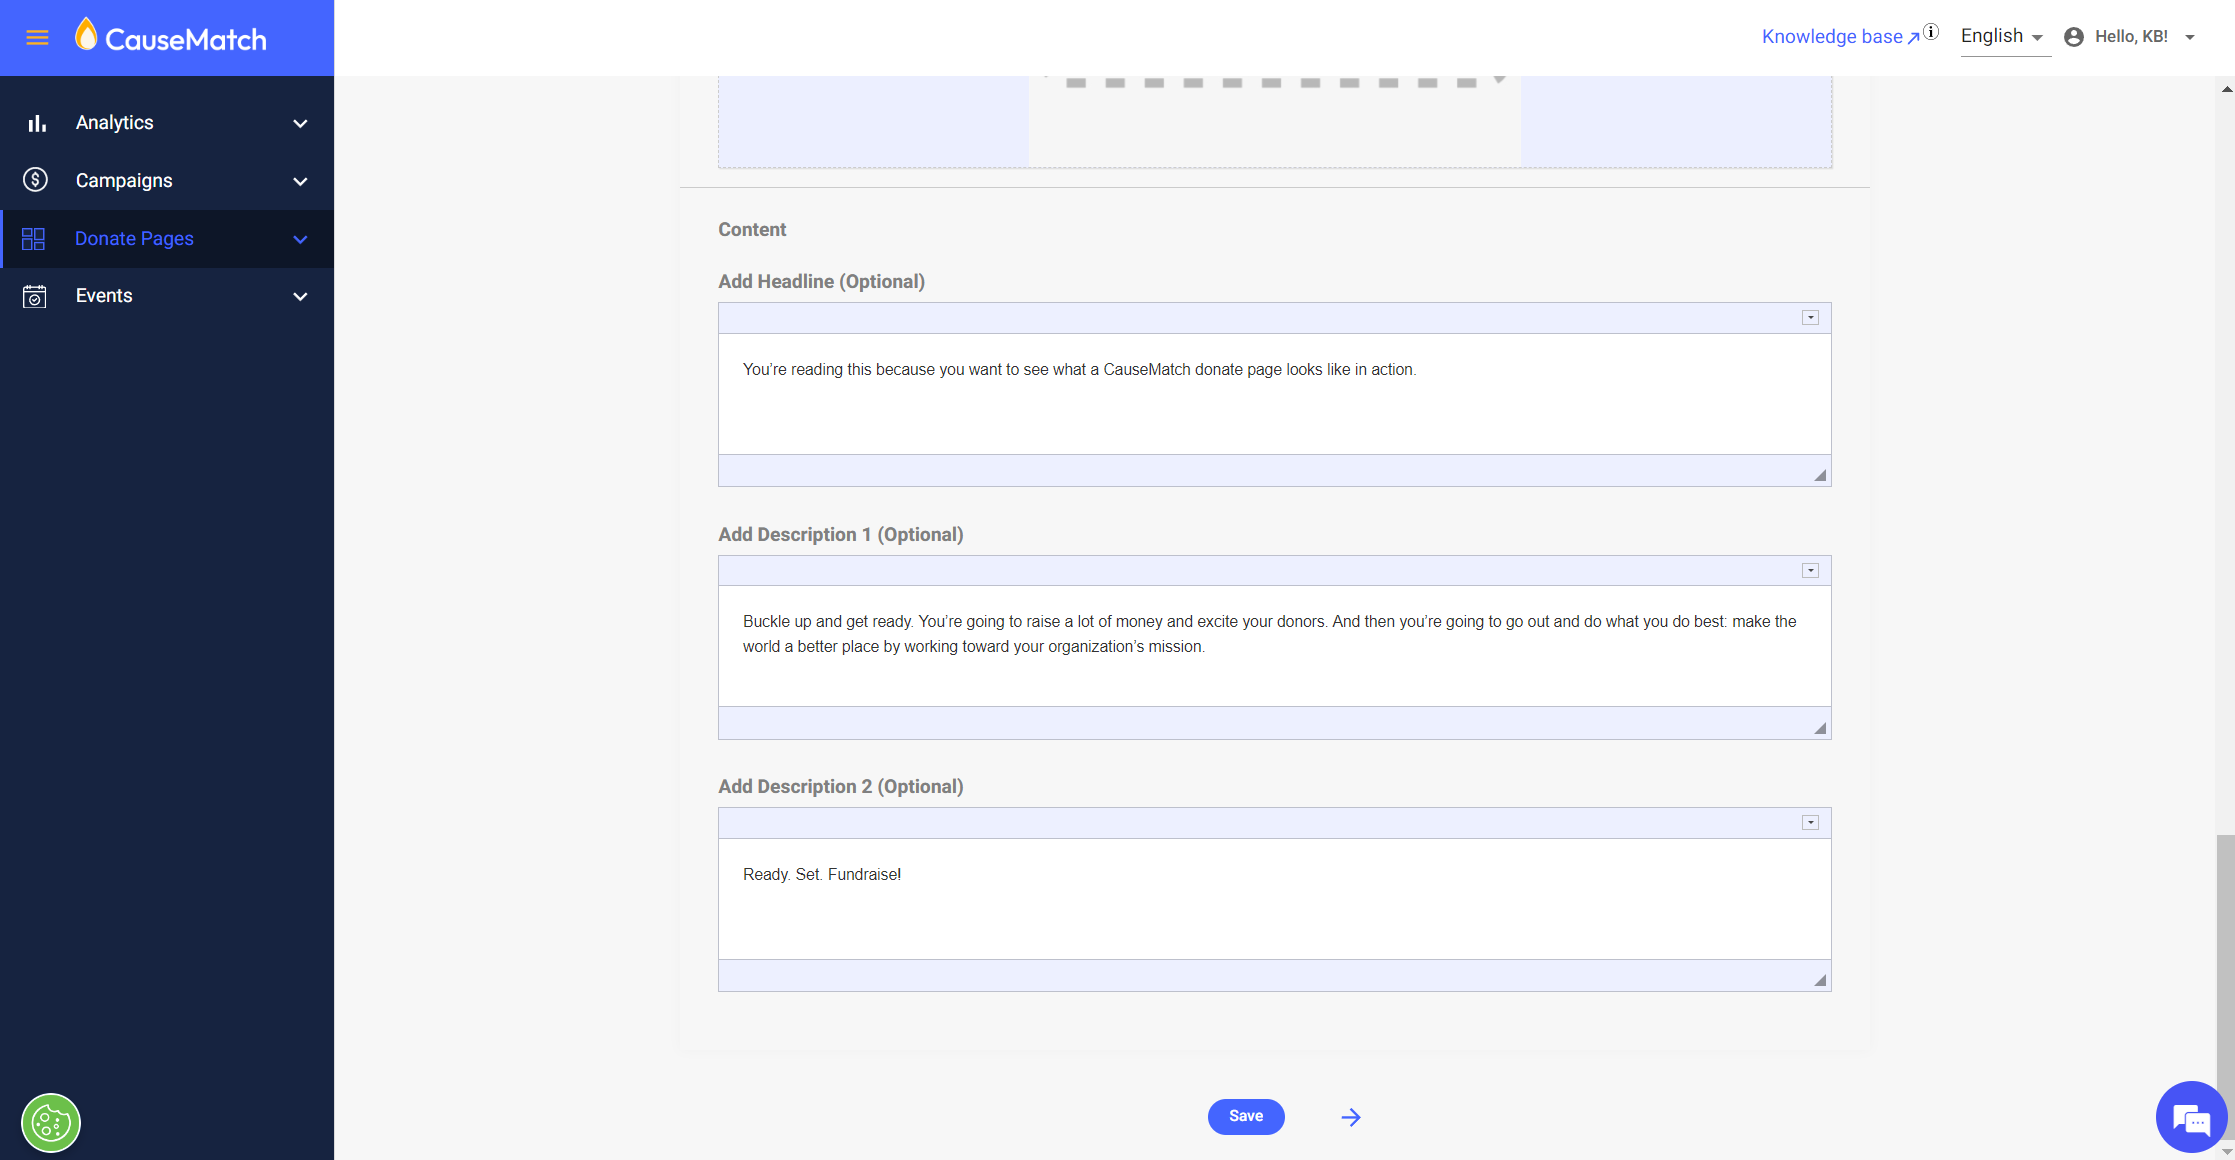
- Now we can edit the Content of the page(please note that these are optional fields). You can add or edit the "Headline" "Description 1" and "Description 2" as shown below.
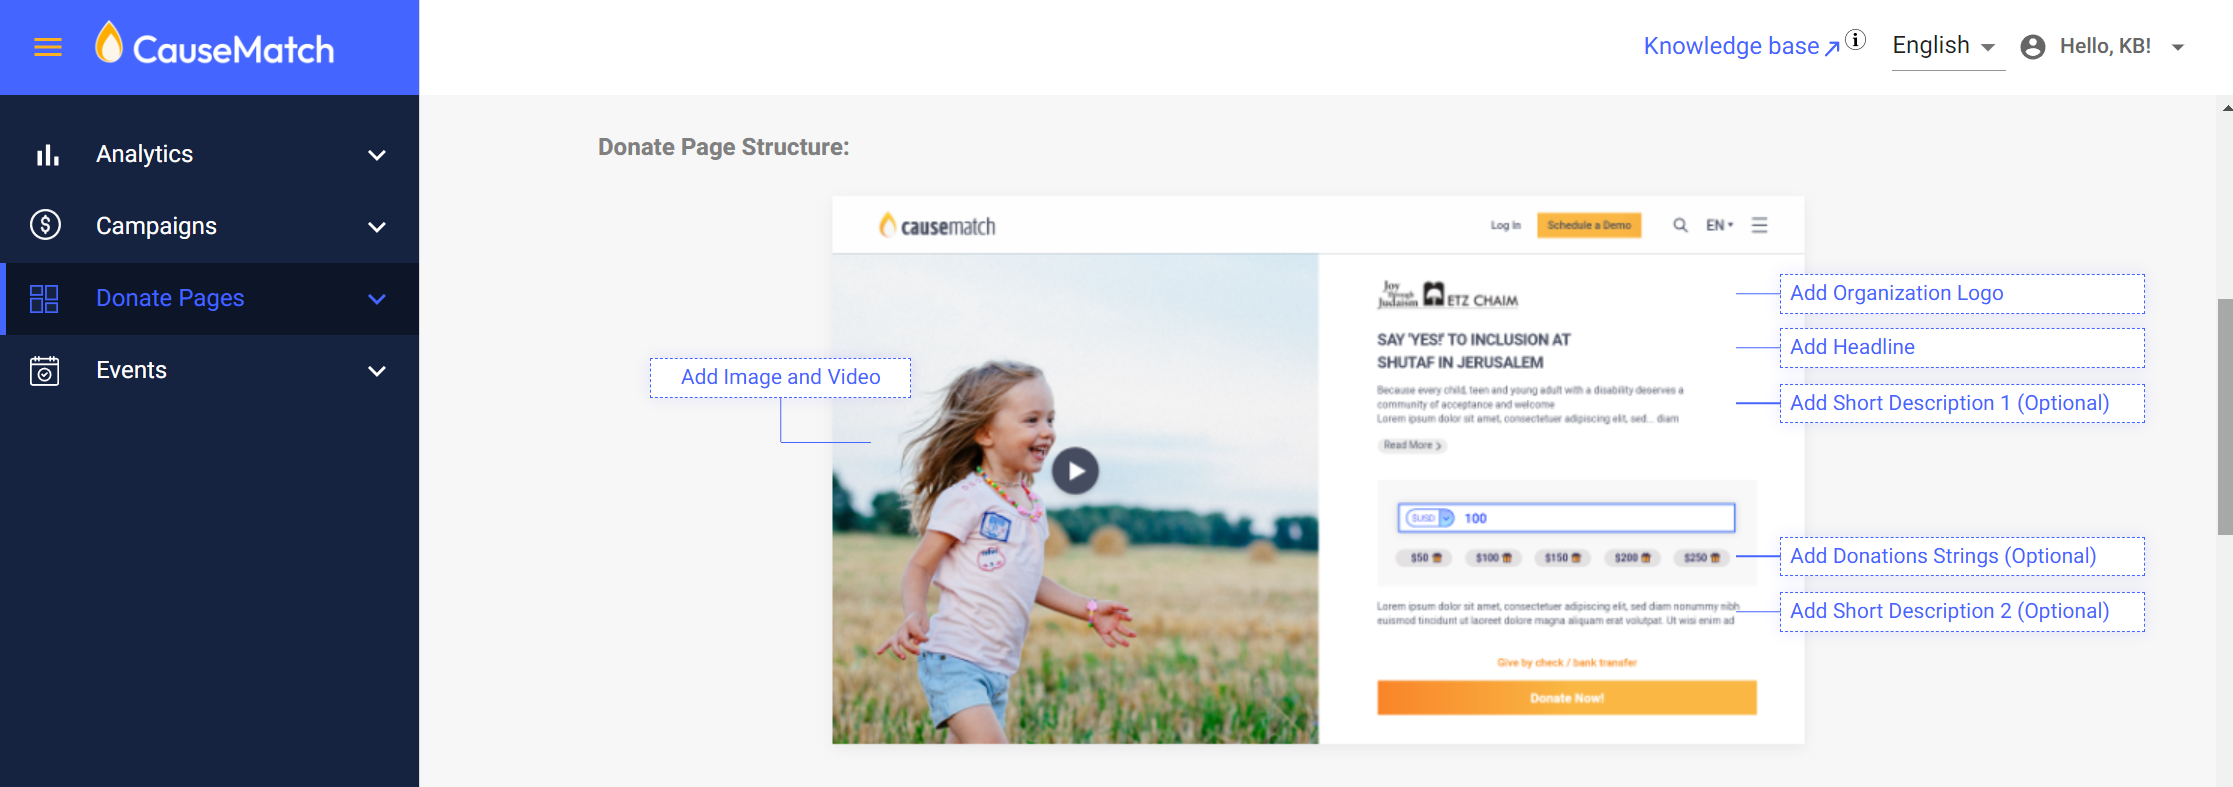
- You can see where the content and graphics mentioned above would appear on the page in the "Donate Page Structure" display.
- Once all the edits are done, click on the Save button at the bottom.
- Now we can go to the SEO & Tracking tab.

- We can edit the SEO "Title", "Description", "Keywords" and a Social Media Image(this should be in 720x392 px size and less than 300 kb). The SEO Title, description, and Social Media Image would come up when we share the link on any social media platform.
- We have the option to add tracking code for Google Analytics, Facebook, Google Ads Remarketing, and Google Ads Conversion tag. You can click on the associated checkbox and add the tracking code there.

- Once all the edits are done, you can click on the Save button at the bottom.
- Now we can go to the "Checkout" options. Here you will be able to add/edit the fields that would come up on the Checkout page(the page that would come up when we click on donate now button). You can click on the toggle button left to the field to enable or disable a field on the checkout page.
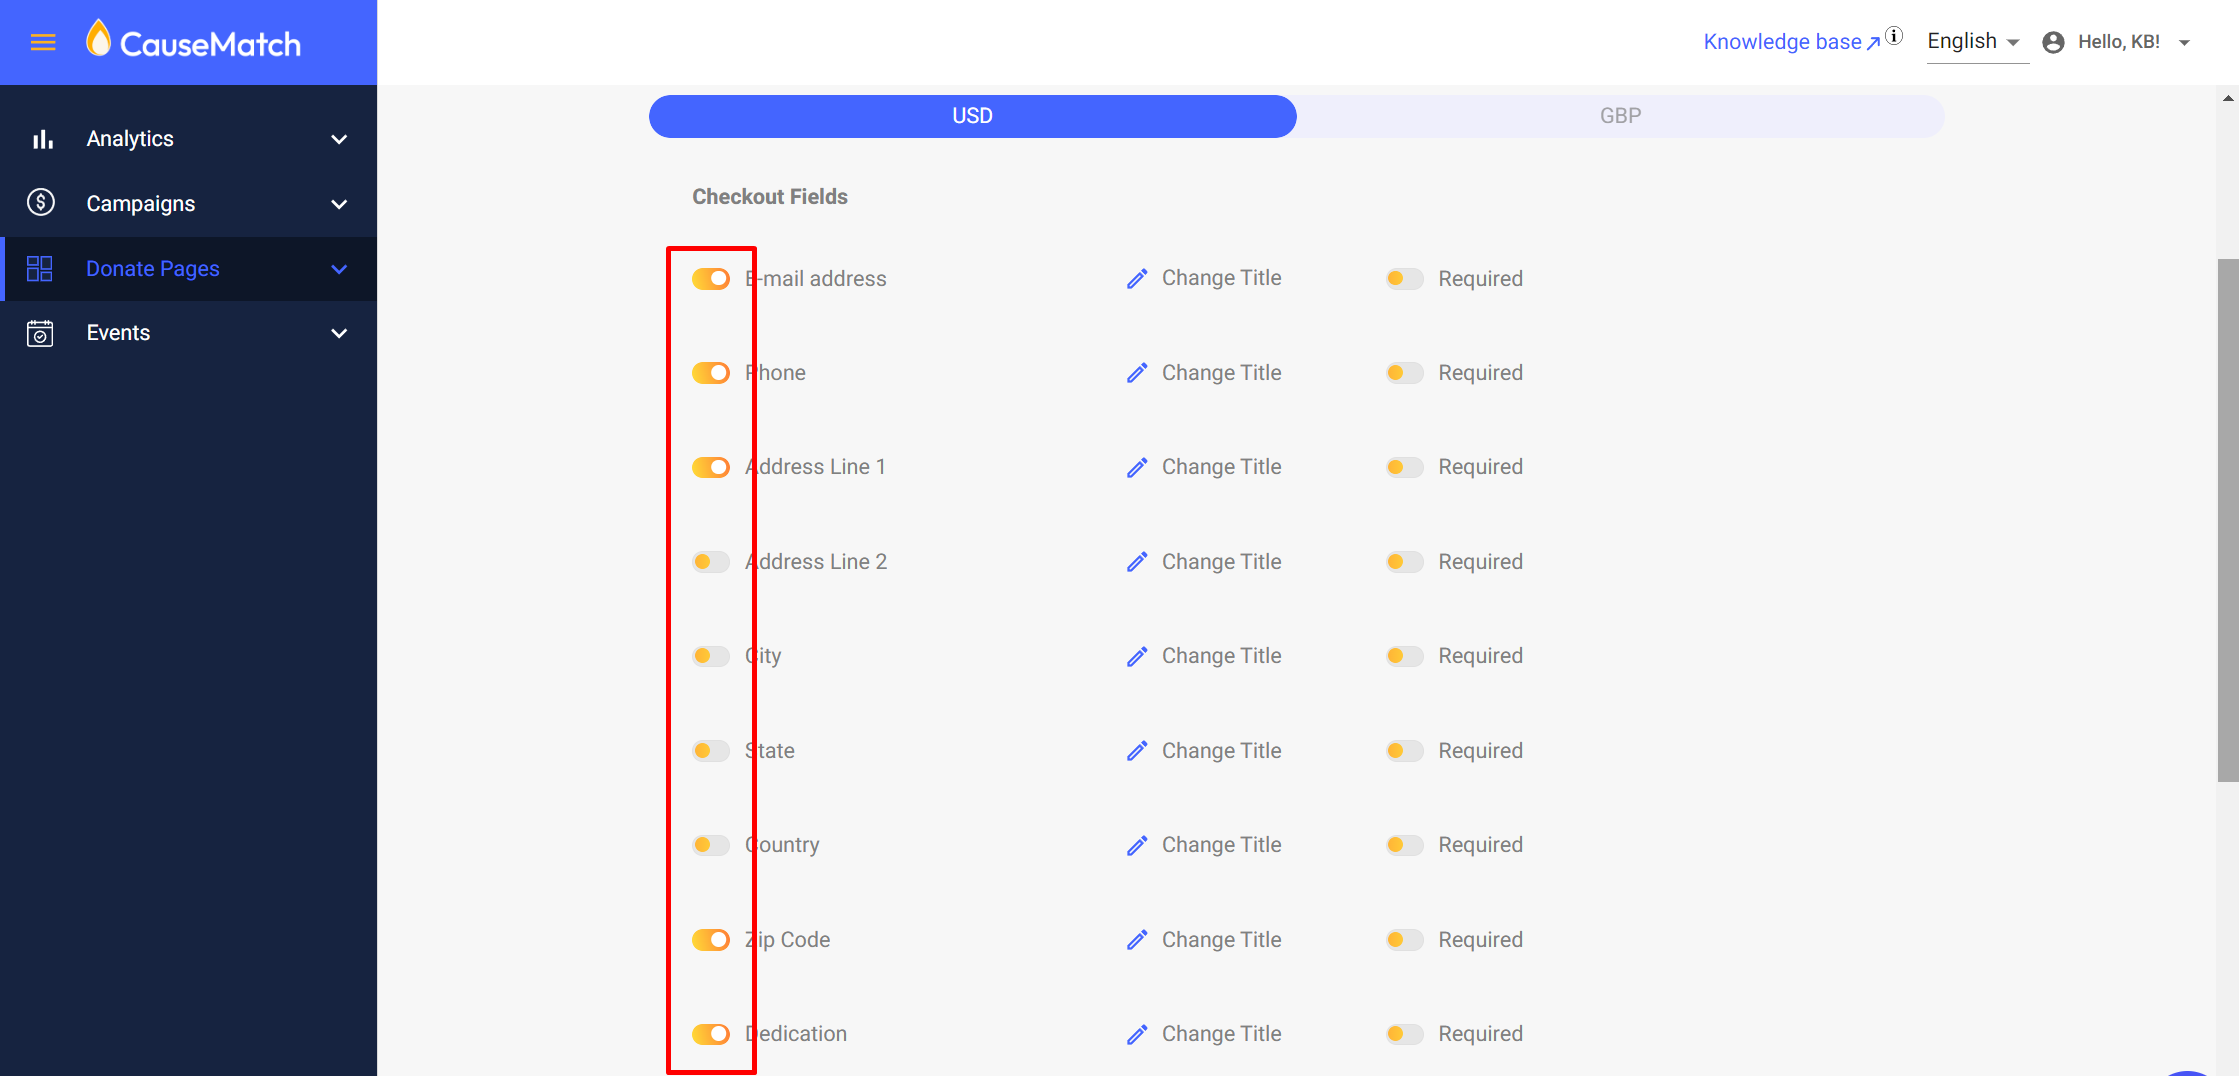
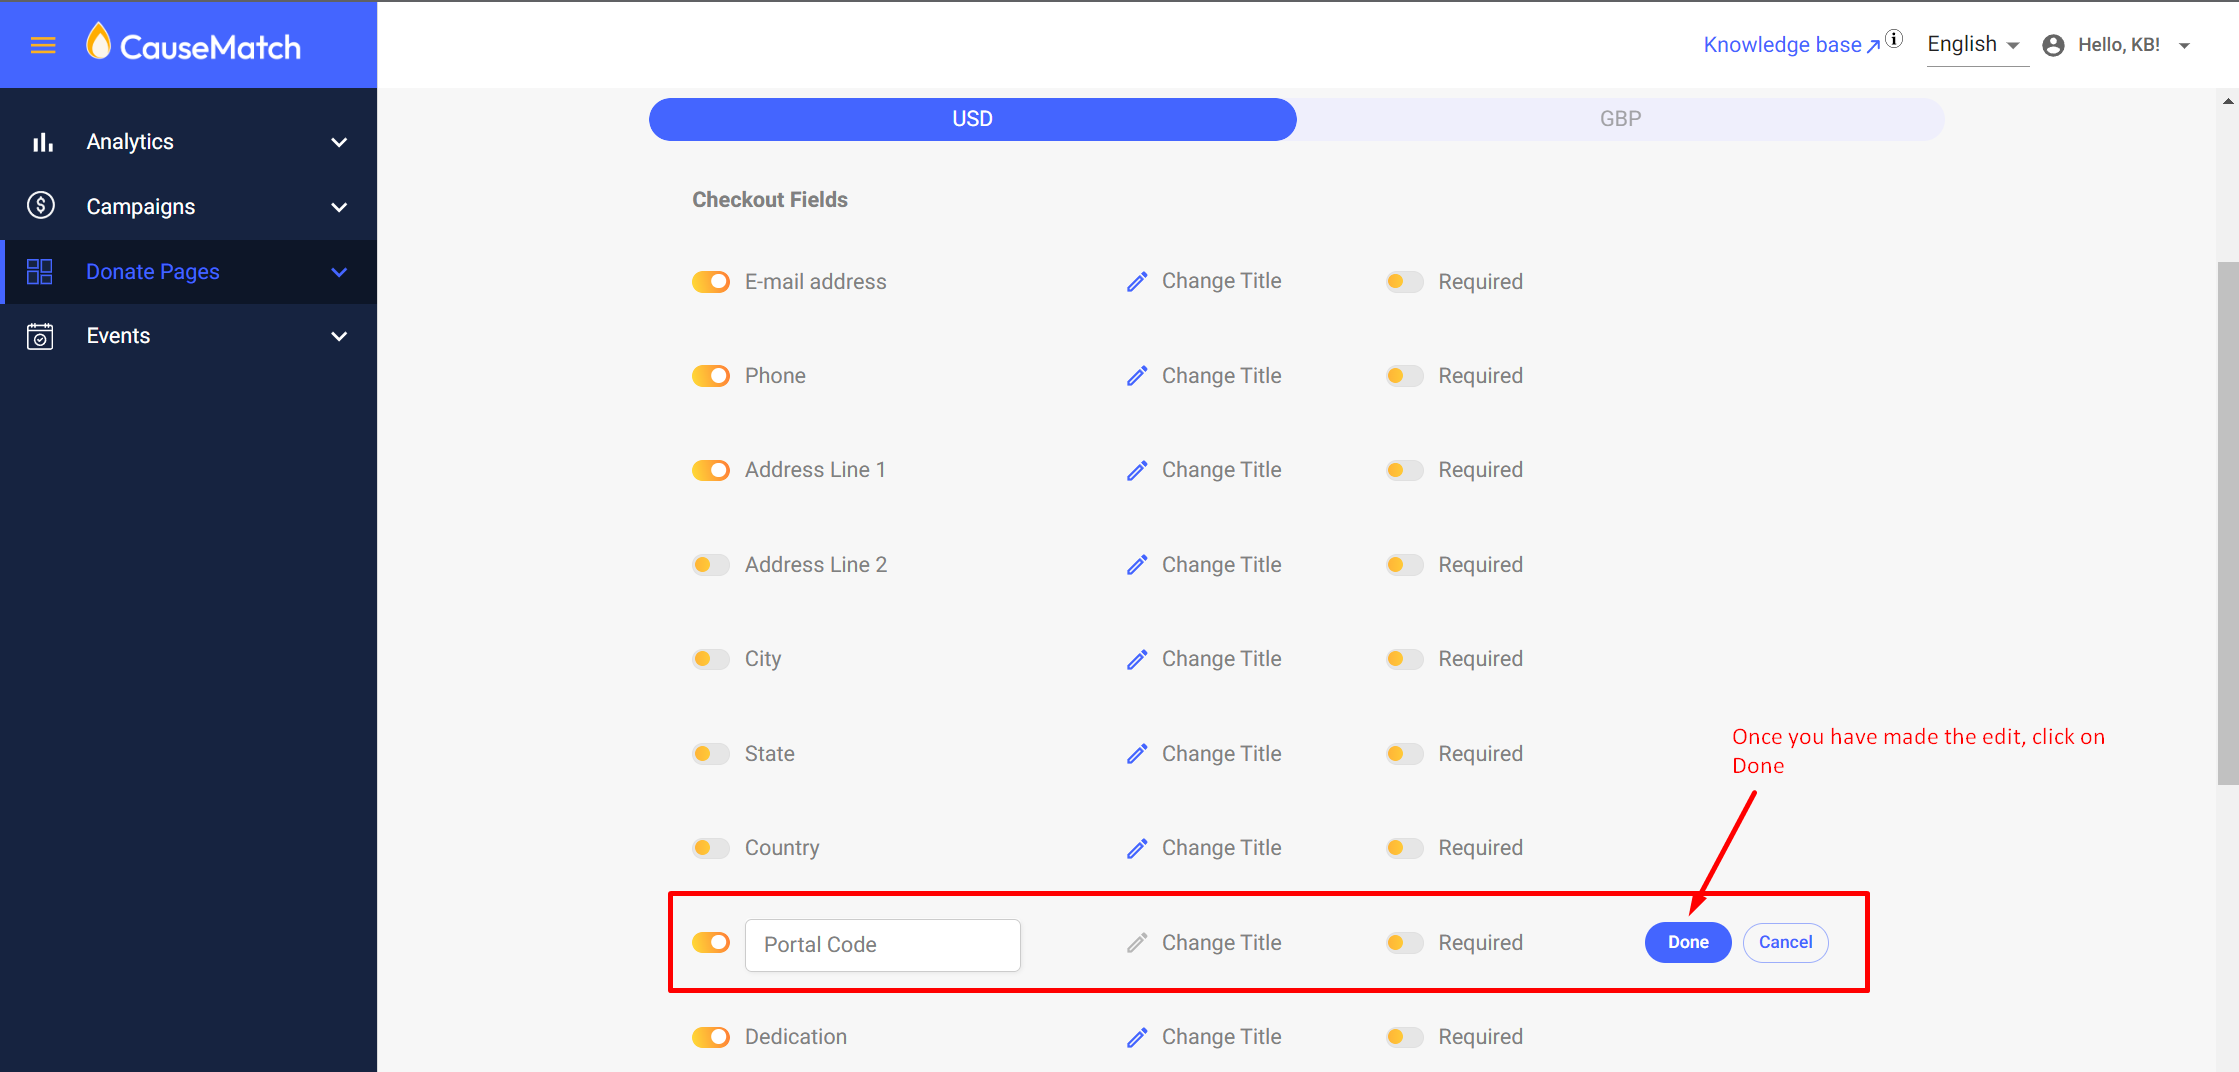
- You can edit the displayed text by clicking on the edit button. For example, you can change Zip code to Postal code. You can also make the field mandatory or optional by clicking on the required toggle button.
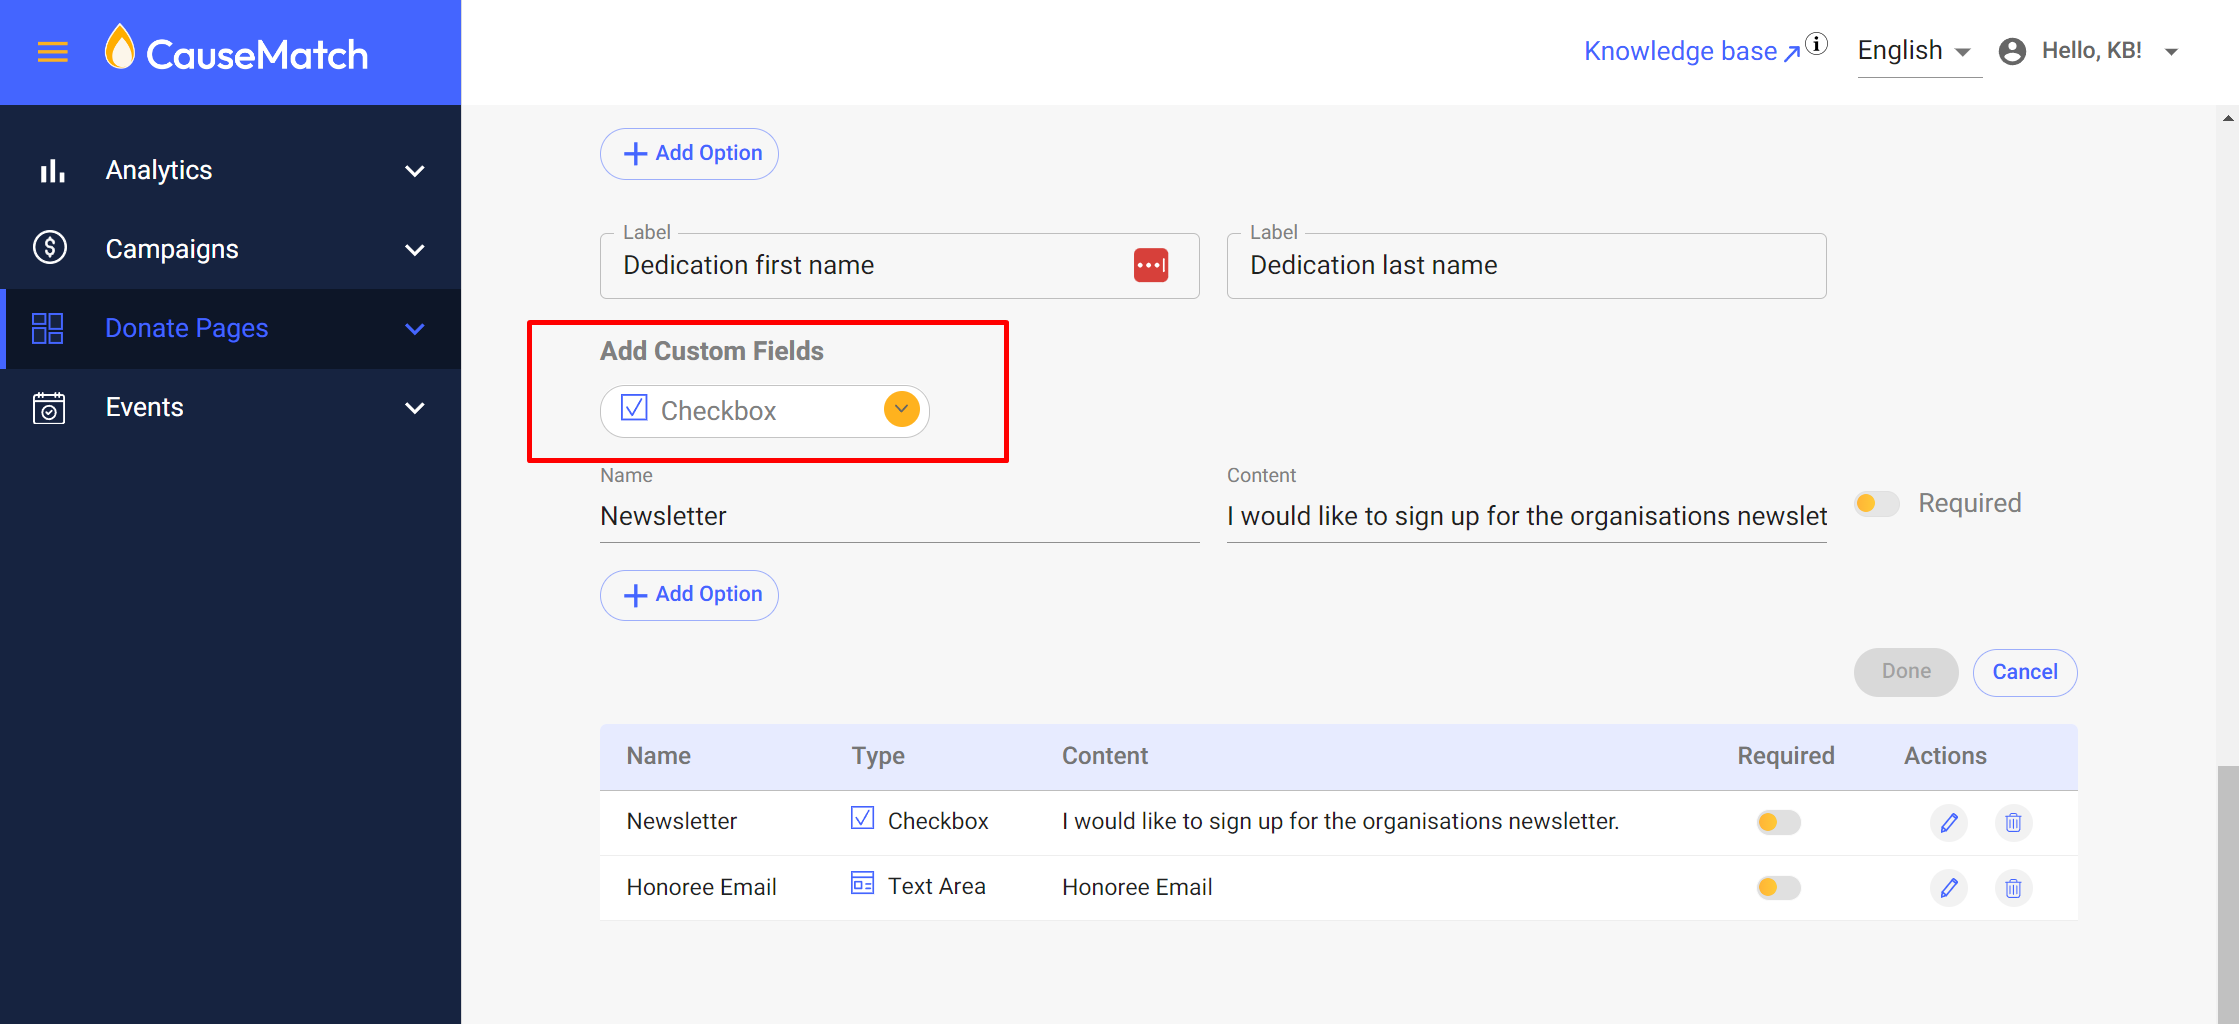
You can also add custom fields like checkbox, radio buttons, text box, etc to the checkout page. You can select the required custom field from the "Add Custom Fields" dropdown. The "Name" we add would only come up on the export and it won't be shown on the page. You can add the text to be displayed on the "Content" field. You can also make the custom field an optional or mandatory field by clicking on the required button.
- Once this is complete click on "Save".
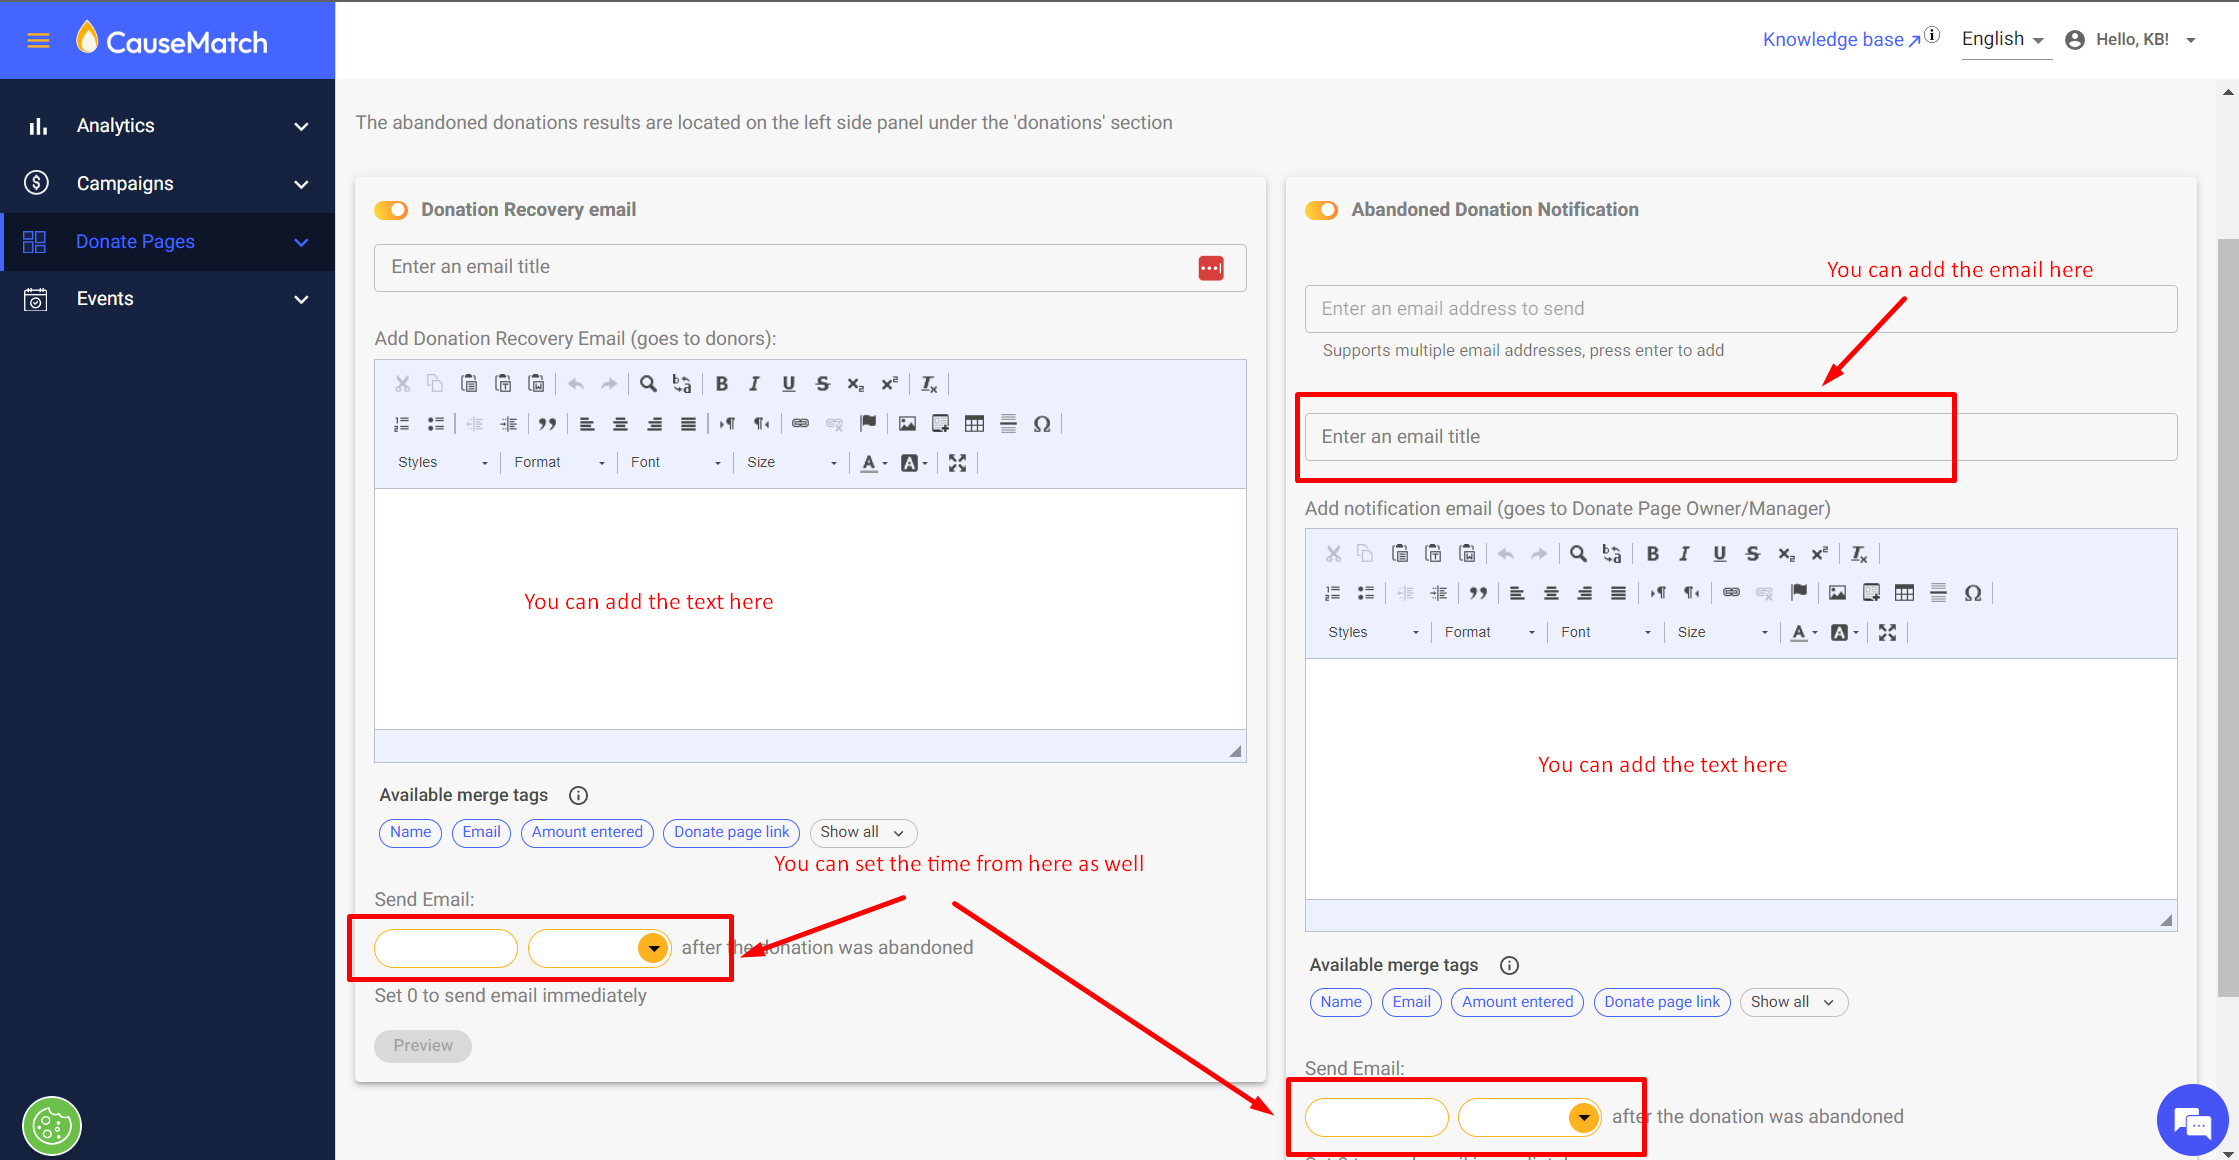
- Now we can go to the "Abandoned" options. We can set up emails to go to the donors and to the campaign owner/manager. You can set up the email that should go to donors who abandon the donations by enabling the "Donation Recovery Email" toggle button. We can also enable emails for the campaign manager/owner by enabling the "Abandoned donation notification" email. You can enter the email address to which you want to receive notifications in the "enter email address" column. You can add/ edit the notification text as well if required from the text box.
- Once this is complete, you can click on "Save" and all the changes will be Saved
Related Articles
Editing your Rally Event Page
Editing your Rally Event Page *Rally tutorial video HERE. After logging into the dashboard, click on the “Events” section in the side panel as highlighted below to see your Rally Events: In the above image you can see: Your Rally Event ID. A toggle ...
How to Edit the “About Campaign” Section of Your Campaign Page
1. Log in to your account using your username and password, or sign in with Google. 2. Select the campaign you want to edit and click the edit button. 3. Navigate to the Design section, then click on the Recent Donors section. Scroll down to locate ...
Tracking Abandoned/Rescued Donations - Donate Page
Login to your account dashboard through this link: https://causematch.com/login , using the credentials shared with you. Click on ‘Donate Pages’ and select 'Abandoned Donations’. Please select your donate page title from the dropdown to see the ...
Editing Team/Ambassador Pages
Accessing the Ambassador/Team Edit section Login to your account using the username and password shared with you. Select the Peer to Peer option on the left side panel to access the layers (ambassadors, communities, etc.) And then as seen in the ...
Deleting a Team Page
Login to your account using the username and password shared with you. Select the Peer to Peer Option on the left side panel to access the layers(ambassadors, communities etc) And then as seen in the image below, from the Campaign selection drop ...